
This tutorial has been borne out of the ability to port my development environments around. Most times I have to create requirements files to specify the dependent packages to be created in my virtual environments.
Creating virtual environments
To learn how to create virtual environments, see below:
- Anaconda: https://hutsons-hacks.info/creating-and-replicating-an-anaconda-environment-from-a-yaml-file
The question I get asked all the time is how to create a file that will allow me to install all the dependencies from specific environments, including pip packages versions into one file.
For us in the know – we solve this by creating a requirements.txt file to be used in our projects. This file essentially takes all the currently loaded packages, that made your file/script work on one machine and packages them up to make your script/application work on another machine. This is the primary purpose of why we would want to create a file like this, and it is a really powerful concept.
A couple of nuances to the environment creation tutorials have been linked here. These delve into if you want a virtual environment for a specific installation of Python, then you will need to follow these sub-points.
Creating a virtual environment with a specific version of Python in Anaconda
Go to Anaconda Navigator > Environments > Create, then as below:
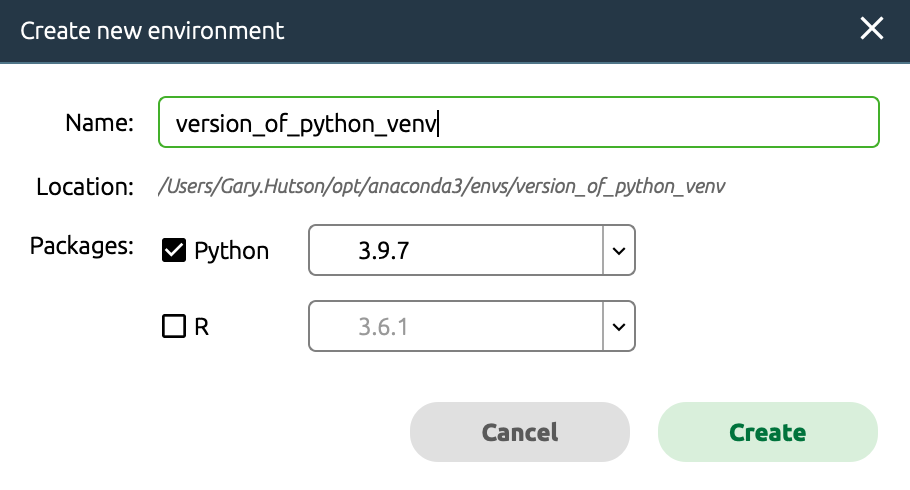
To do the equivalent in code, follow these steps:
- Open Terminal or Powershell
- Type the following command to create a new virtual environment. You will be prompted to install packages to create new environment:
conda create -n version_of_python_venv python=3.9.7 anaconda
Creating a virtual environment with a specific version of Python in pip
To do this in pip, there is no visual option, the best approach I have found to do this is outlined in these steps:
- Download the specific version of Python you need to your machine e.g. for 3.7.9: https://www.python.org/downloads/release/python-379/
- Install the Python executable file. I recommend the default settings here, and no need to add to PATH system variables
- Open your terminal / command prompt / bash or whatever window you have on your operating system.
- Next we will need to install a package called virtualenv to make this work. Follow the script below:
pip install virtualenv
We are nearly there. To recap, up to this point you need to have carried out the above sub steps and you should have the virtualenv package installed from pip. The final steps are to create the virtual environment and get going:
- Create the virtual environment in your favourite brand of terminal using the below command:
pip install virtualenv
2. Next we want to see where our Python version is installed:
where python
3. This will print where the Python.exe is stored, as we will need this when we are creating a virtual environment. Next, we then make a directory where the virtual environment will be stored, to do this in code we can use the mkdir command in the command prompt:
mkdir py_venvs
4. Next, I will change the directory to my new folder just created:
cd py_venvs
5. Now it is time to create my virtual environment with a specific version of python:
python -m virtualenv -p="C:\Users\garyh\AppData\Local\Programs\Python\Python37\python.exe" py37_venv
To break this down:
- The python -m switch indicates to create a new virtual environment
- We call the virtualenv package we installed in pip
- The -p switch says I want to use my version locally in Python to create a new virtual environment, as the previous tutorials will create the virtual environment based off the newest version of Python, and this is not what we always want
A great tutorial on how to do this on a macOS can be found here.
Creating the requirements.txt file in Python venv
This is very straightforward in a Python virtual environment, firstly you will need to set up a virtual environment, otherwise, you will be printing all the packages that reside in the base installation of Python.
Next, follow these steps:
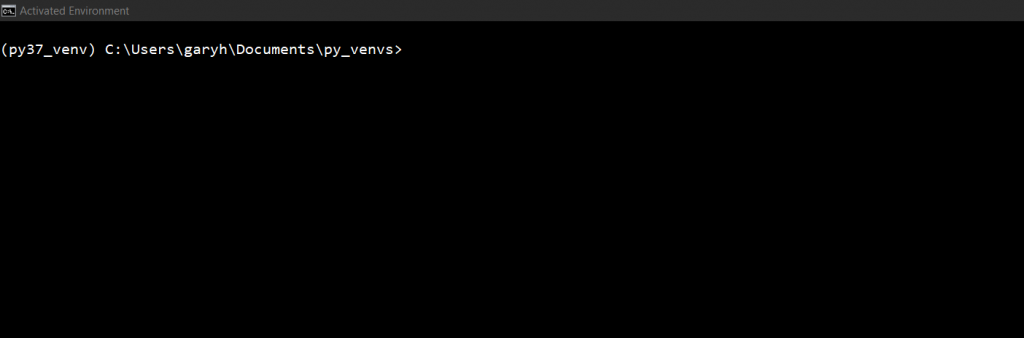
- Activate your virtual environment. My new virtual environment will be located in my py_venv folder I created in the previous step. This will depend on what you called the virtual environment and which folder you stored it in:
cd py_venv
# Activate the environment
.\py37_venv\Scripts\activate.bat
This says look relative for a virtual environment named py37_venv and then navigate to the Python scripts folder and use the activate batch script, if this is successful you should see the virtual environment become active:
2. Now, I will use the following command to export out the requirements.txt to be used when we are creating new virtual environments:
pip freeze > requirements.txt
This will simply list all the installations on that specific virtual environment. This is really useful, as we can now use this to set up a completely new virtual environment based on the installed packages and the same Python version. The theory is – everything should work the same as it does on my local machine, as they have been tested under the same Python package versions.
Using the generated requirements.txt to create a new virtual environment
We will practice and create another virtual environment, with a specific Python version, in the virtual environment folder I have been working in. The only things that will change for you are the folder names and whatever you decide to call your virtual environment:
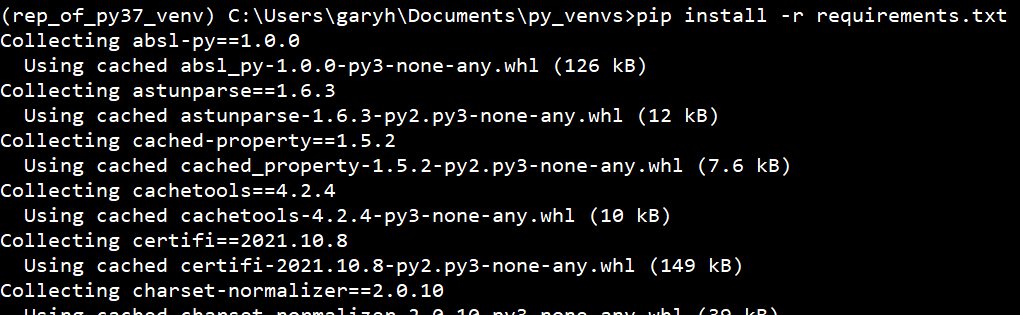
cd C:\Users\garyh\Documents\py_venvs
# Create a new environment that we will use to install the requirements.txt to
python -m virtualenv -p="C:\Users\garyh\AppData\Local\Programs\Python\Python37\python.exe" rep_of_py37_venv
# Activate the new virtual environment
.\rep_of_py37_venv\Scripts\activate.bat
# Virtual environment will be active = (rep_of_py37_venv)
pip install -r requirements.txt
This script will navigate to where the environment needs to be created, create the new environment in the folder, activate the environment and then use the requirements.txt stored in the top level folder to create the environment with the same packages as the previous environment that we used pip list on:
Once this is completed your setup will look exactly the same as your original environment. This is how you use a requirements.txt, or whatever you call the .txt file to install all the same dependencies as before.
Watch this tutorial
I have created a supporting YouTube video to solidify this content. I hope you find the video hereunder useful for these purposes:
Heading out
If you like this content, please remember to subscribe and give the video a like. I really enjoy putting these together and it helps when I get nice comments and feedback.
The video has some coding errors, and I sometimes think this:
